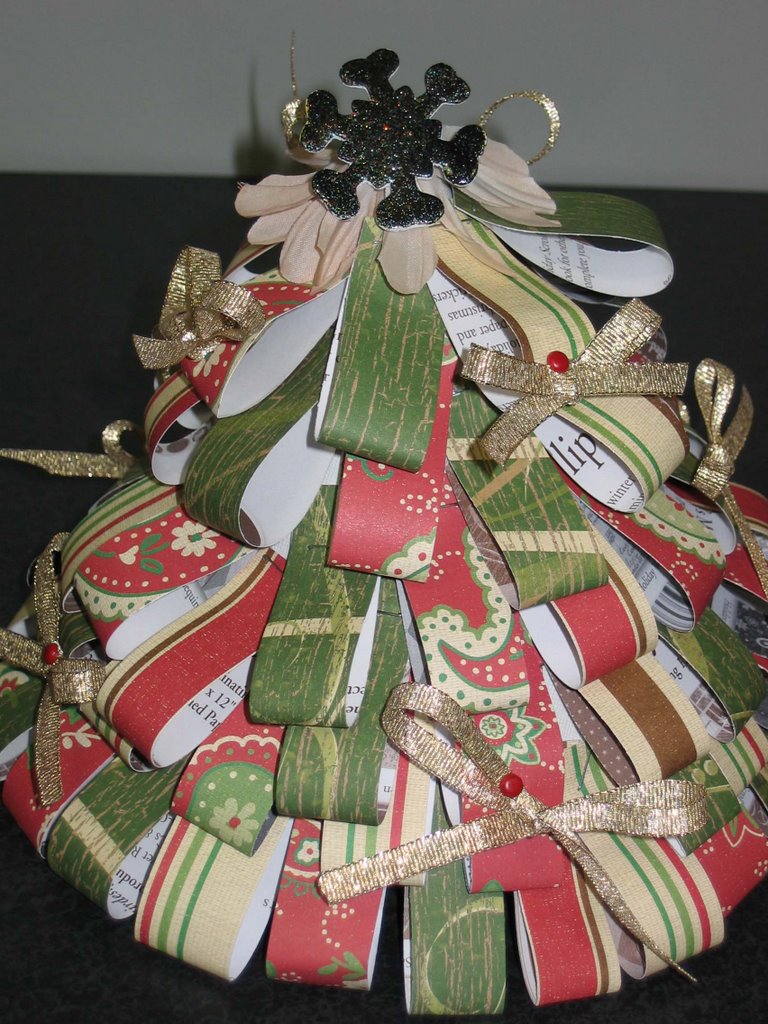
I saw an "altered" Christmas Tree on Two Peas and decided that it would make the perfect Christmas gift for my oldest son's teacher. This tree took about 2.5 hours from start to finish. You can coordinate any type of paper or ribbon with the design to make this tree.
Directions:
1. Take one sheet of cardstock and create a large circle and cut the circle out.
(I used a big plate to trace around)
2. Cut the circle straight up the middle and then twist the circle to create a cone.
3. Cut 1 inch stripes out of patterned paper (or cardstock).
4. Loop the 1 inch stripes and secure it to the cone using staples or adhesive.
5. Work your way around the cone placing the 1 inches stripes on the cone until it is full.
6. Get a large flower and place it on the top (to look like snow and to cover any staples) and secure it to the cone with adhesive.
7. Take ribbon and make bows and secure them onto the tree using brads.
8. Top the tree with a cut out of your choice.
Thursday, December 14, 2006
Altered Christmas Tree
Tuesday, December 05, 2006
Black and white photos

There are some layouts that just call for black and white photos. Bright colored paper and busy designs on paper make it quite easy to use black and white photos. Not only does it make the photos stand out but the look is timeless.
I created this layout for the 2 Scrappy Chicks DT submission.
Subscribe to:
Posts (Atom)